
I know that this might seem of more interest to a photographer than for someone that just want to appreciate images, but it is intriguing sometimes to see the difference between a snapshot of something and the careful approach to really get the best out of a subject.
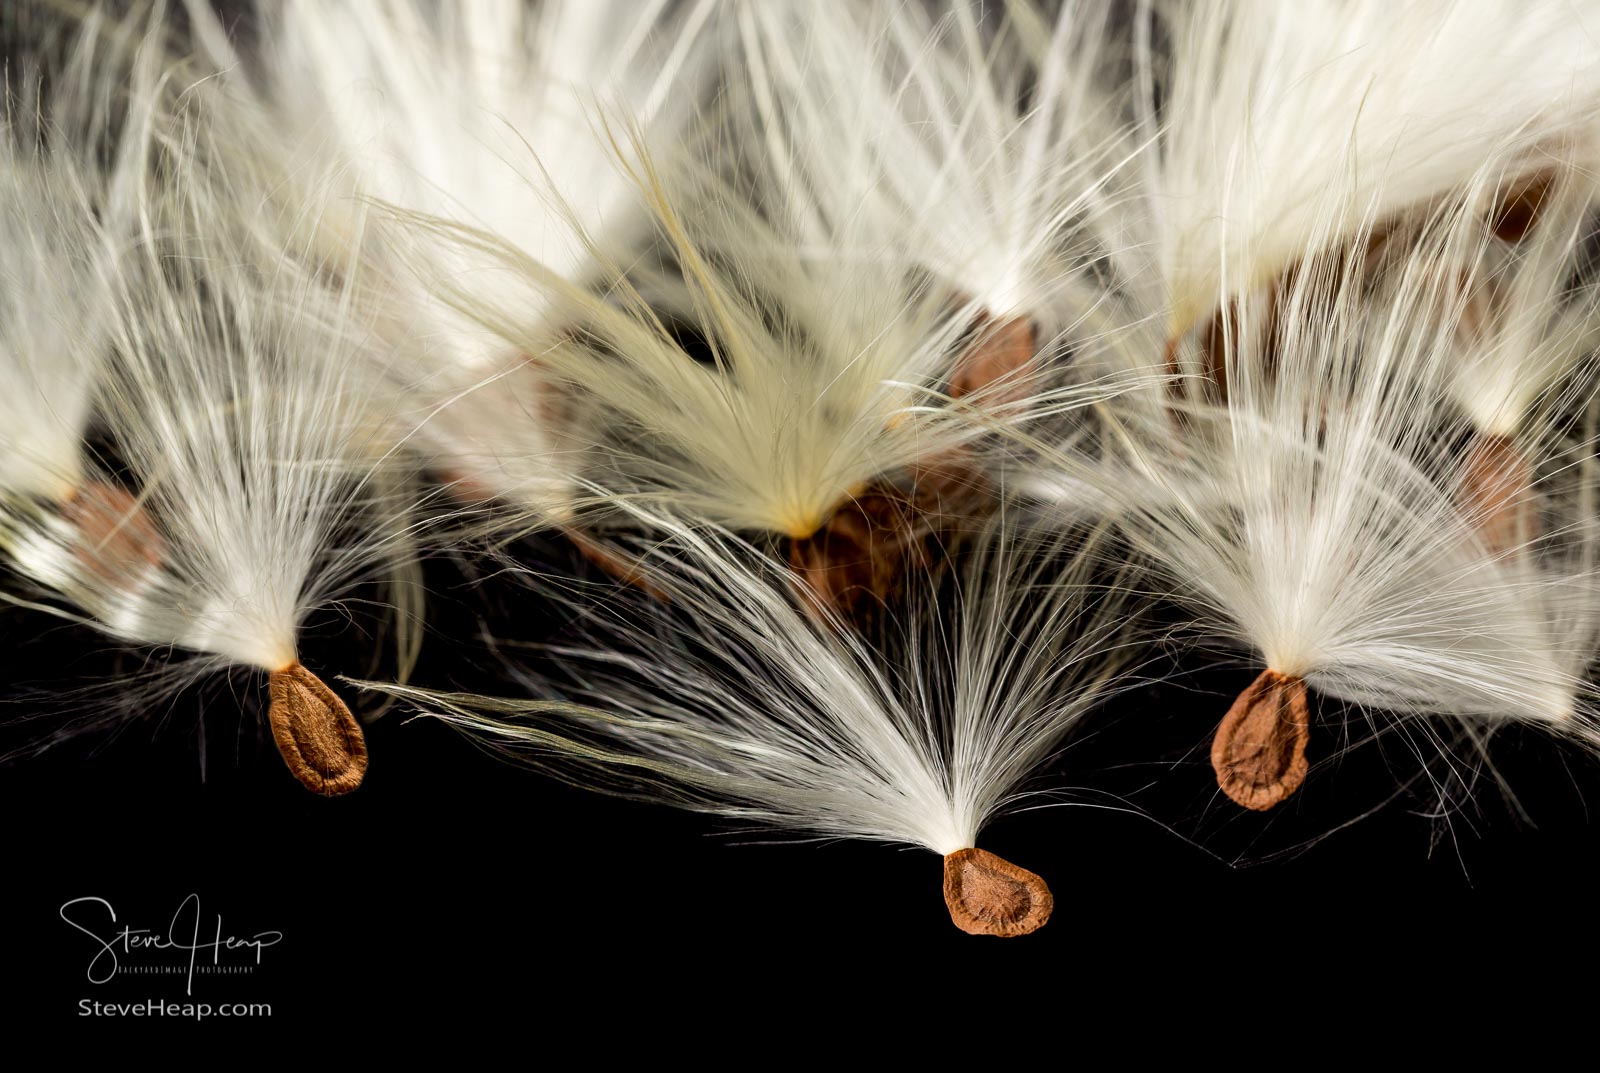
A few years ago, my wife and I were walking around a small pond in Northern Virginia when we saw some large plants at the water’s edge with large, palm sized seed pods. Unbeknown to me, these are the pods holding the seeds of the Swamp Milkweed plant and when you open them, like a shellfish, the individually seeds are immaculately laid out in rows ready to catch the wind and blow to a new home to grow! Great, I thought, something to photograph!
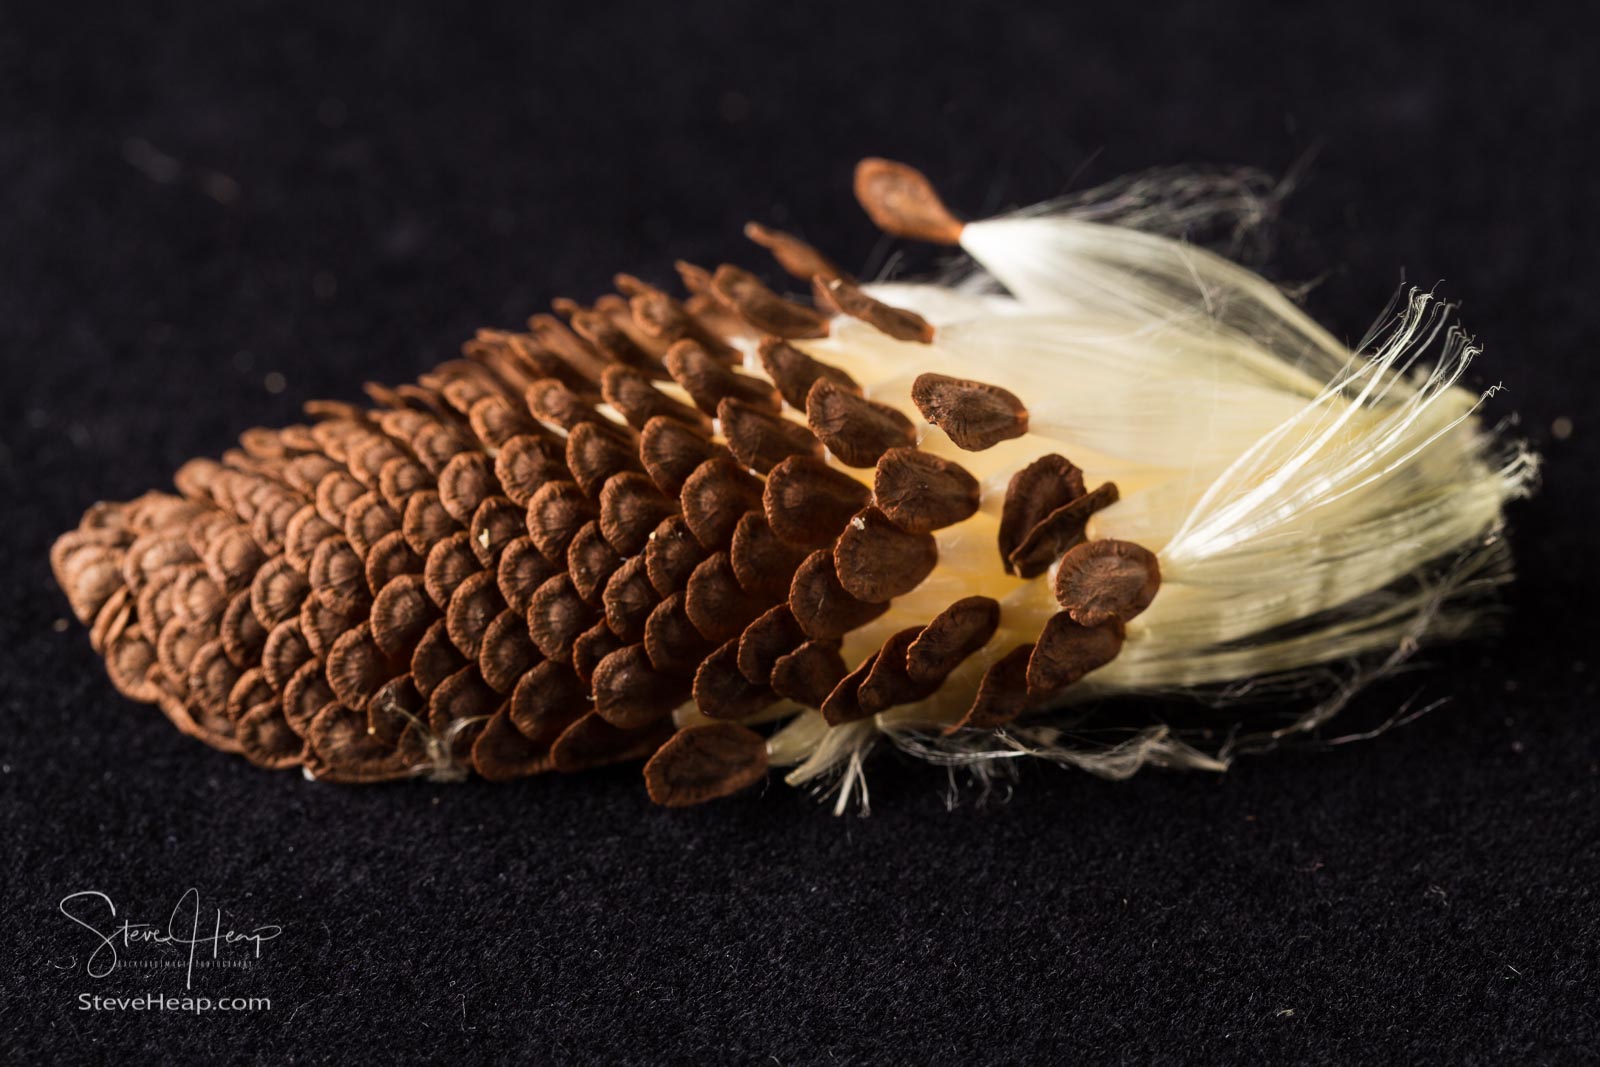
But how to photograph them? I wanted a black background to show off the incredibly fine plumage and so some black velvet was laid out. But then we come to a law of physics – the closer a camera lens is to an object, the less of the object will be in focus. So even though I have a lens that can focus just a short distance away from the front element, each picture only has a slice of the seedpod in focus:
The solution is another bit of technology – focus stitching. I’ve talked about how modern image processing software can stitch images taken from the same point into a panorama (and some phones do that automatically as you take a broad “swipe” across the scene). In the same way, you can take many pictures of the same object each with a minute change in the point that is in focus, and the software will take the sharpest bits from each image and stitch those into one final photo.
So, setting up some flash guns for lighting (to keep it consistent from shot to shot) I started with the focus on the front edge and slowly moved that focus point towards the most distant point in the seed pod. 15 images later, I had a series of shots that covered all pieces of the object. With the stitching accomplished, I could move on to find and remove all the bits of fluff and dust that naturally is attracted to velvet and also remove those little white bits of dust on the seeds themselves to create the final version:
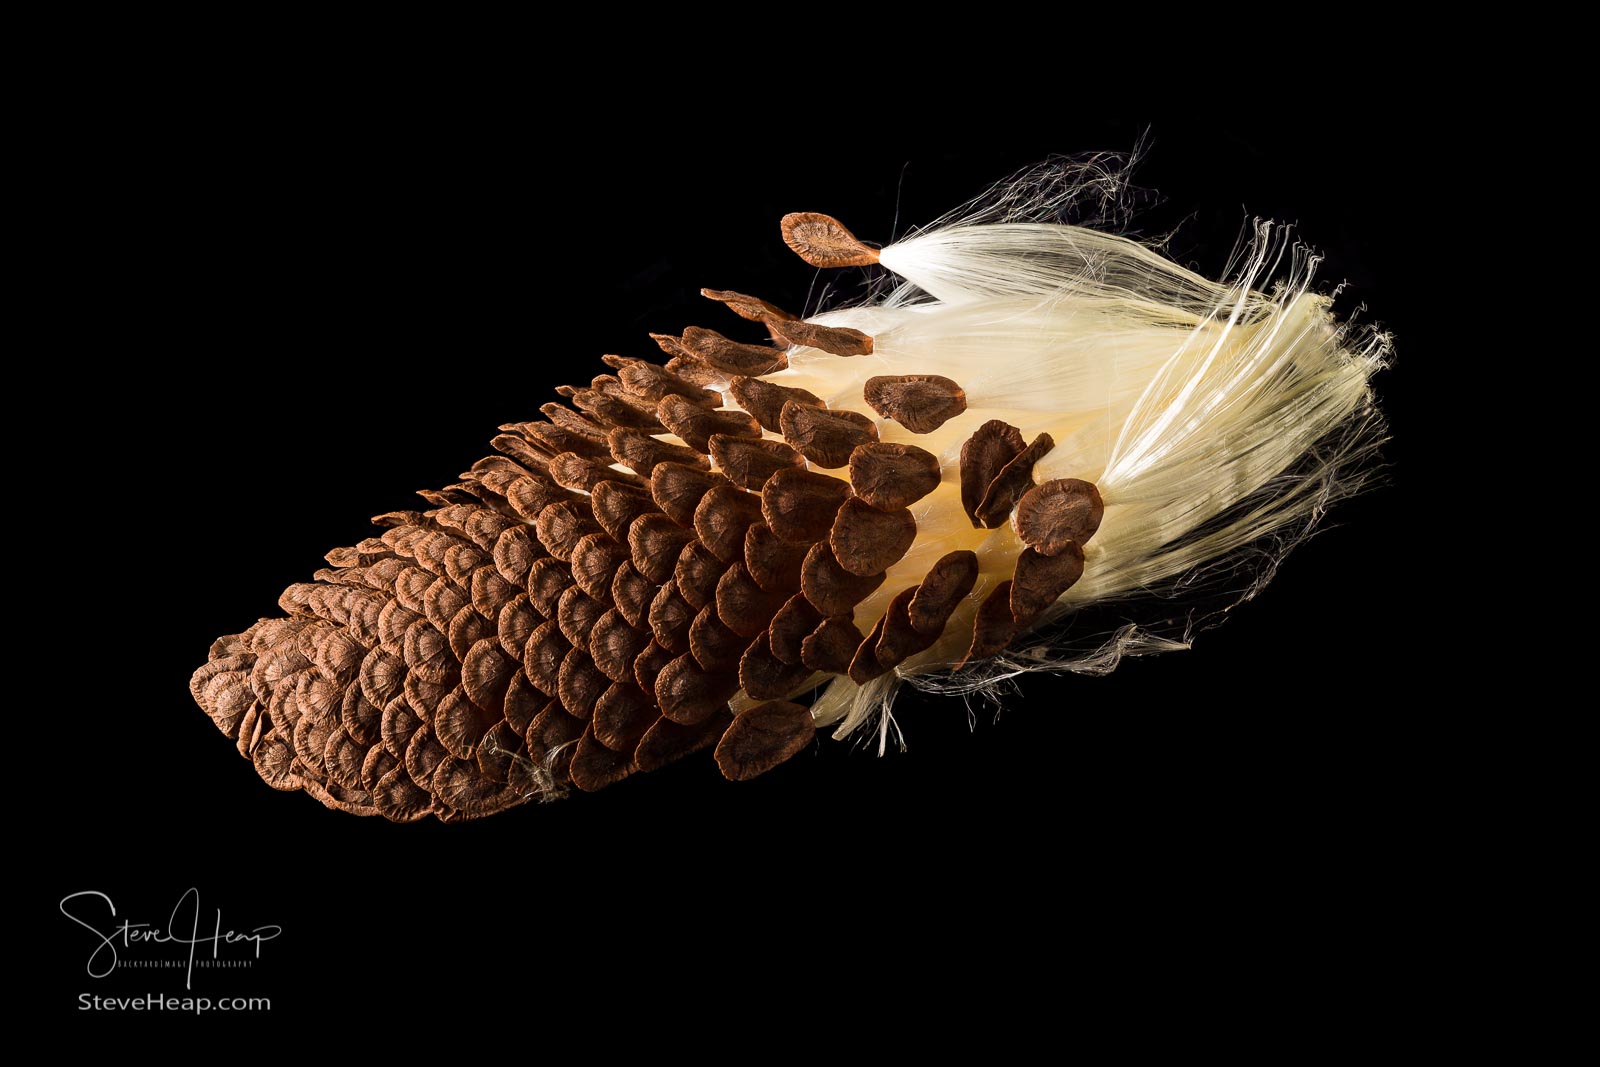
Why is it rotated slightly? Well, our eyes are attracted strongly to diagonal lines, and it makes the image appear stronger and more appealing!
I repeated the same exercise with the seeds inside an opened pod as well as with the multiple seeds used for the first image above.

I really like this series of pictures – so much so that I have printed out large copies of these final two and they hang side by side over the bath in my home.


Louis Dallara Fine Art Photography
20 Feb 2022Love the image, great work