This is a little different to my normal stories in that it is more of a “how to” explanation of creating a video from still images.
I’ll start with the punchline – the video is complete, the story is narrated (by me) and it is now live on YouTube. You can watch the completed episode here:
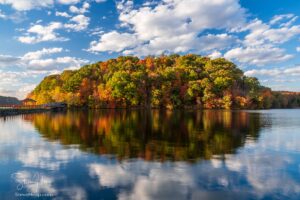
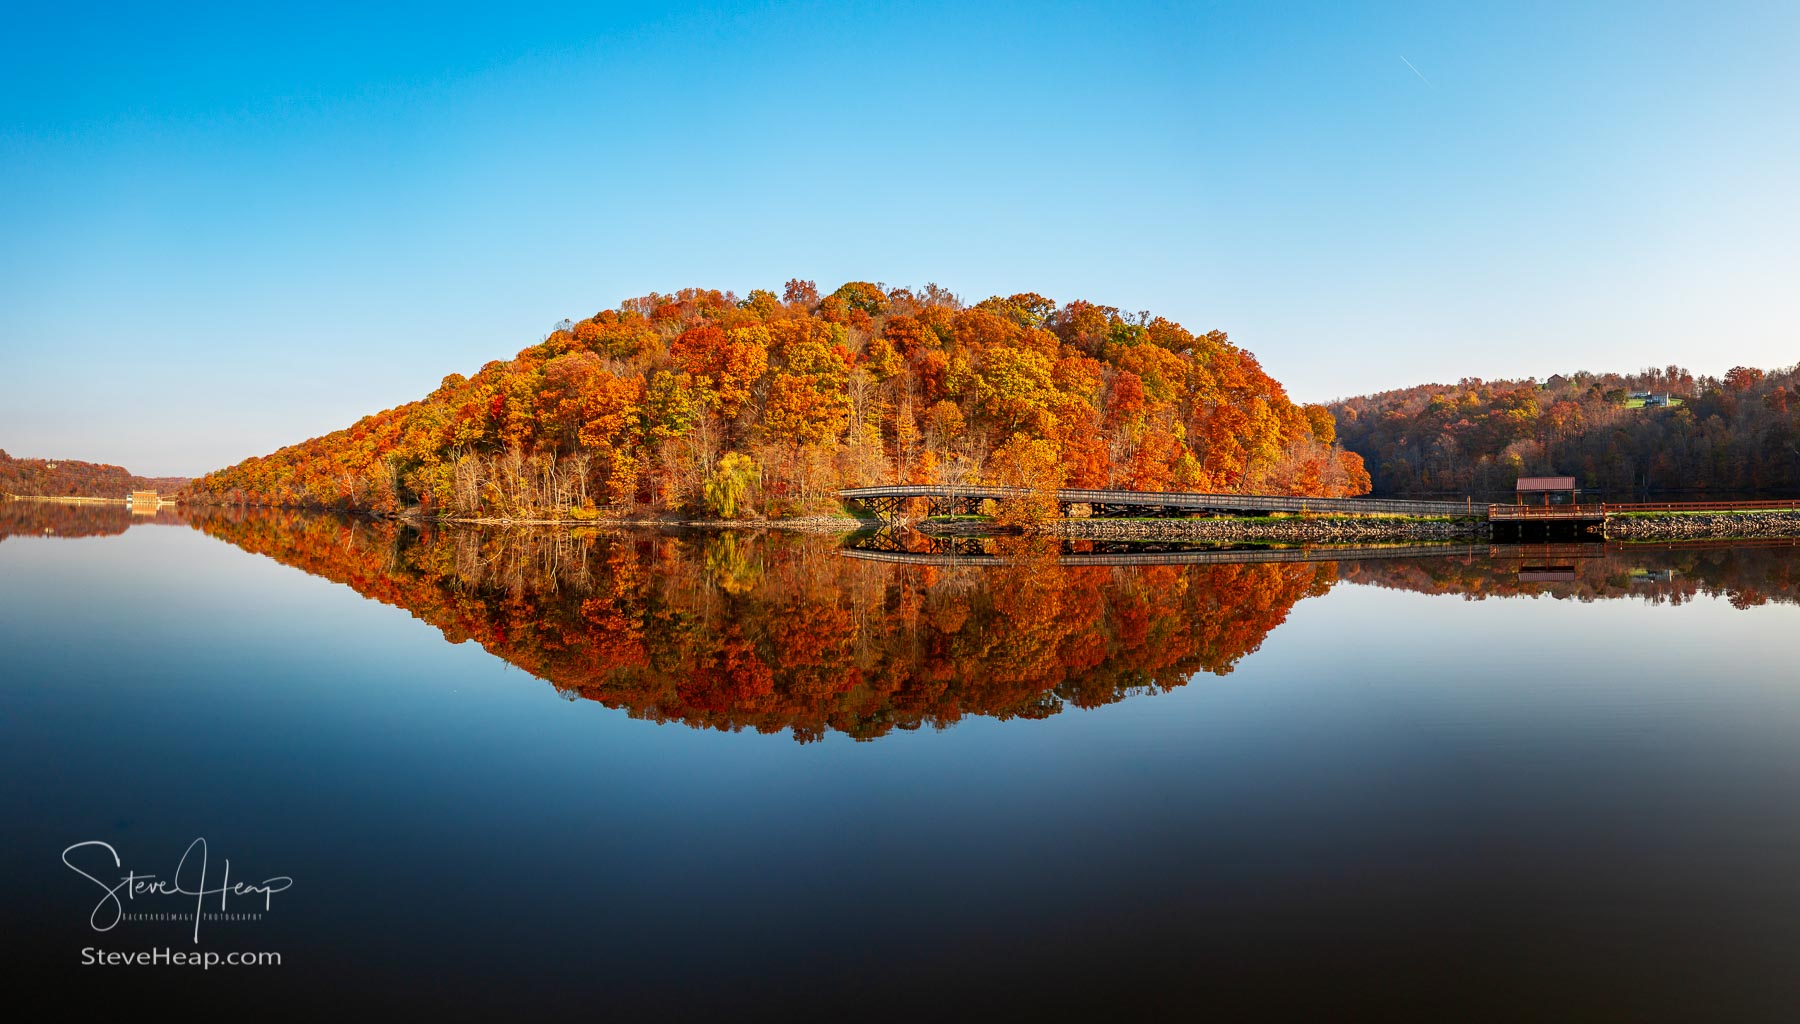
As you will have read in my story about Cheat Lake, the video tells the story of the creation of Cheat Lake when the dam was constructed back in 1925. I generally approach the story by first selecting the images I wanted to use with a general outline in my mind. I also had a video taken by my drone flying down the valley as the river approaches the lake and I thought that would be great for the initial part of the history of the lake.
With the photos chosen, I created full size copies of them as Jpegs to use in the creation of the video itself. I had chosen to make an HD (rather than 4K video) because I wanted a lot more freedom to “zoom” into a photo, which is something that you can’t really do when small versions are included in a blog post such as this. I do always upload images that can be looked at full screen, but even then, there is a lot of detail that is lost.
I used Adobe Premiere to create the actual video. Perhaps not for the faint-hearted, this is a complex beast of an application, but you can do almost anything with the images. But first I made use of its audio capabilities by recording the soundtrack. You would think this was easy, right? I had an Edirol digital audio recorder and I put it on the desk in front of me and read the text. Importing that into Premiere gave me the soundtrack and I then went through adding photo after photo to match the story as it unfolded. I didn’t want a static view of image after image and so I either started with a zoomed in portion of the photo and then zoomed out to fill the screen with the full image, or I panned from one side to the other, especially on panoramas. I didn’t want fancy transitions, although there are many available, as I thought that would distract from the imagery.
So, I completed this, exported it as a movie ready for YouTube and published it. Mistake number one! My subscribers were informed of the new video, and some started to watch it and give it some nice comments. But my photography buddies (especially one who has worked for years with Greek TV and also as a professional narrator basically said my voice recording was horrible – empty and lacking in any depth! We talked a lot about this and decided that starting with a decent microphone was a good way forward. Luckily my son is in the music business, and he has some professional gear and so I borrowed a studio mike and started again with the whole thing. What a difference! The mike only picks up what is directly in front of it and so the old fan noises were gone and my voice was so much richer and full of life. It had a little bit of enhancement in Premiere to add some “presence” but I was able to edit into the project without disturbing my images too much.
Now I could upload to YouTube as an unlisted video to check how it looked, added a couple of features at the end to allow viewers to subscribe to my channel (please do!) and also see one of my other videos as the next one to watch. And, when everything was ready, I could publish it.
The whole thing took a couple of days (not full time), but it was a labor of love. Now on to my next one!
My images are available as fine-art prints on metal, acrylic, canvas and framed wall art, and also on many products from shower curtains to jigsaw puzzles. Please check out my store for easy ordering and delivery directly to your door. You will find the images used in this video in the West Virginia collection.